
How to Set Up a Foil Stamping & Die Cutting Machine for 1,060×760mm Paper
Setting up a foil stamping and die cutting press for a specific paper size — especially one as large as 1,060×760mm — can feel daunting. You’ve got the heavy chase, the hot foil unit, the die cutting plate, and the constant fear of misregistration or uneven pressure. I’ve been there, helping shop floors troubleshoot everything from foil tear to partial cutting.
This guide is built from real hands-on experience. We’ll walk through the entire setup process for handling 1,060×760mm sheets, tackle the frequent pain points, and I’ll show you how to avoid the three most common mistakes that waste material and time.
Let’s get that press running clean and precise.
Before You Start: What Makes 1,060×760mm Different?
Standard presses handle A3 or slightly larger sheets, but once you move into the 1,060×760mm range, several challenges appear:
-
Even pressure distribution becomes critical. A 10% pressure difference across the platen can ruin half the sheet.
-
Foil pull length increases, raising the risk of foil wrinkling or snapping.
-
Die and counterplate alignment must account for thermal expansion during hot foil stamping.
Most setup mistakes come from treating a large-format machine like a smaller one. That’s why we’ll follow a sequence that prioritizes stability and repeatability.
Prepare the Machine Bed and Paper Stock
Before touching any dies, clean the platen and the paper feed table thoroughly. Dust or dried ink debris — especially on a [Image: close-up of cleaning a large platen with a microfiber cloth] large-format press — can create local pressure points. Use isopropyl alcohol and a lint-free cloth.
Then, test your 1,060×760mm paper stack. Measure the grain direction and moisture content. Paper that’s too dry becomes brittle under die cutting; too damp, and it stretches during foil stamping.
Pro tip: Run five blank sheets through the feeder without any foil or die to check for skew. For this paper size, the acceptable skew should be under 0.5mm over the entire length.
Mount the Foil Stamping Die and Counterplate
This is where precision pays off. For hot foil stamping, you’ll need:
-
The brass or magnesium die
-
A silicone or Teflon-backed counterplate
First, secure the die using the chase’s locking bars. Tighten from the center outward — just like torquing cylinder head bolts. Then insert the counterplate. For 1,060×760mm sheets, always use a counterplate that is at least 15mm larger than the paper size to avoid edge indentations.
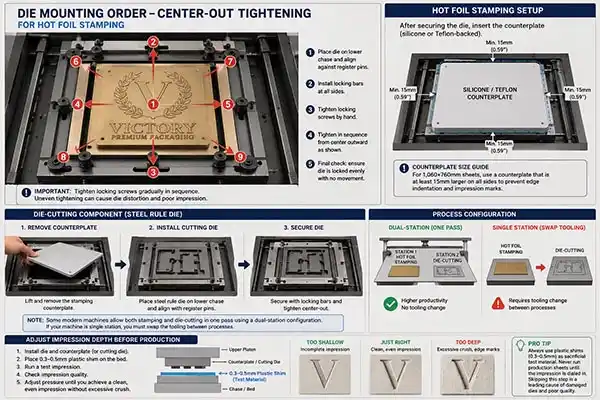
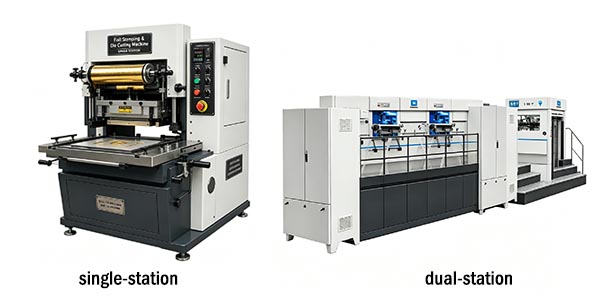
Now for the die-cutting component. Remove the foil stamping counterplate and install the cutting plate on the same lower chase. Some modern machines allow both processes in one pass — but that requires a dual-station configuration. If you’re working with a single station, you’ll need to swap the tooling.
Many operators damage their dies by skipping a step: always adjust the impression depth before running production sheets. Use 0.3–0.5mm thick plastic shims as sacrificial test material.
Calibrate the Pressure Curve
Pressure setting is not “one number fits all.” For 1,060×760mm paper with a standard 300–400 gsm weight, start with:
-
Hot foil stamping: 4–6 tons of total pressure
-
Die cutting: 8–12 tons, depending on the cutting rule sharpness and paper fiber
Here’s a field-tested method: Place five strips of carbon paper across the platen — left, center, right, and two diagonal positions. Run a single impression at low pressure. The carbon transfer will reveal high spots and low spots. Adjust the leveling screws on the press frame until all five strips show a uniform medium-gray impression.
Real-world example: A carton printer in Dongguan kept getting partial foil transfer on 1,060mm sheets. After the carbon test, they found a 0.2mm drop in the center-right region. Three turns on the adjustment screw fixed it — saving 1,200 sheets from rework.
Set Foil Pull Length and Temperature
For 1,060×760mm paper, the foil indexing length must be at least 1,120mm to allow overtravel for the margin. Program the foil feed to advance 20–30mm beyond the image area on both sides. This prevents “ghosting”.
Temperature guidelines:
| Foil Type | Temperature Range | Dwell Time |
|---|---|---|
| Metallic | 110–130°C | 0.6–0.8 |
| Pigment | 120–140°C | 0.7–0.9 |
| Holographic | 115–125°C | 0.5–0.7 |
Start at the lower end. Run three test sheets and check for full transfer without bleeding. If the foil tears, reduce dwell time; if it doesn’t adhere completely, raise the temperature by 3°C increments.
Registration and Die Cutting Alignment
Registering a 1,060×760mm sheet is challenging because any misalignment magnifies at the corners. Use the side lays and front stops on your feeder. Then manually cycle one sheet through with both foil stamping and die cutting engaged.
Measure four points on the printed result:
-
Top-left to top-right distance
-
Bottom-left to bottom-right
-
Diagonals
For a well-aligned machine, all four should be within ±0.3mm. If not, adjust the pull roll timing or the side lay position.
Common mistake: Adjusting registration after the machine has run for an hour without letting it cool down. Thermal expansion on a large platen can shift the register by 0.1–0.15mm. Always perform final registration calibration when the machine is at its operating temperature.
Trial Run and Quality Check
Now produce five full-speed sample sheets. Check for:
-
Foil adhesion – tape test
-
Cutting quality – clean edges, no fiber tearing on the 1,060×760mm sheet perimeter
-
Register consistency – between the first and fifth sheet
If all three pass, you’re ready for production. If not, don’t jump to big adjustments. Often, small tweaks — like cleaning the foil pull rollers or adding a slip sheet — solve the issue.
Three Mistakes That Waste Time
-
Skipping the carbon pressure test leads to uneven hot stamping and partial die cutting. Add 10 minutes to your setup; it repays in 2 hours of saved rework.
-
Using the same counterplate for foil and die cutting, the cutting operation will dent the soft silicone counterplate, ruining the next foil job. Always swap or use a dual-station machine that separates the functions.
-
Ignoring paper humidity — dry paper on a 1,060×760mm sheet cracks at the creases. Condition your paper in the pressroom for 24 hours before a critical run.
When the Job Demands More Efficiency
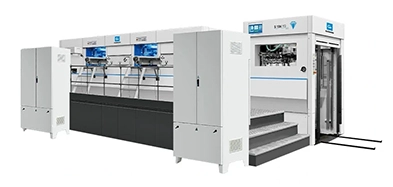
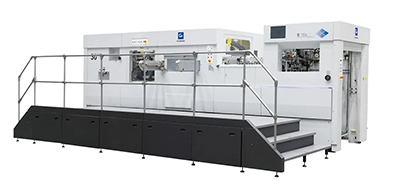
If you regularly handle large-format sheets and need to switch between hot foil stamping and die cutting without constant tooling swaps, a dual-station configuration keeps production flowing. One station runs the foil application, the other handles the cutting — simultaneously. This cuts setup time by nearly 40% and eliminates alignment drift between passes.
For shops that want to explore this workflow, you can check out a dual-station solution designed for 1,060×760mm paper here. It’s built with separate pressure controls per station, so you’re not compromising between foil brightness and cutting precision.
Final advice: Document your pressure, temperature, and register settings for each paper type. Over time, you’ll build a setup database that turns a 45-minute changeover into a 15-minute routine.


 English
 Français
 Español
 Português
 عربي
عربي